
If you only need basic site analytics, the Google Analytics integration article covers that directly. Google Tag Manager (GTM) is the right choice when you want to manage multiple tags, such as GA4, Meta Pixel, and Google Ads conversions, from one place without editing code each time.
NeetoCal doesn't send custom events to Google Tag Manager. Instead, you can set up all your tracking directly in GTM using its built-in triggers like page views, button clicks, form submissions, and scroll depth.
You can connect GTM separately to each intro page and each scheduling link.
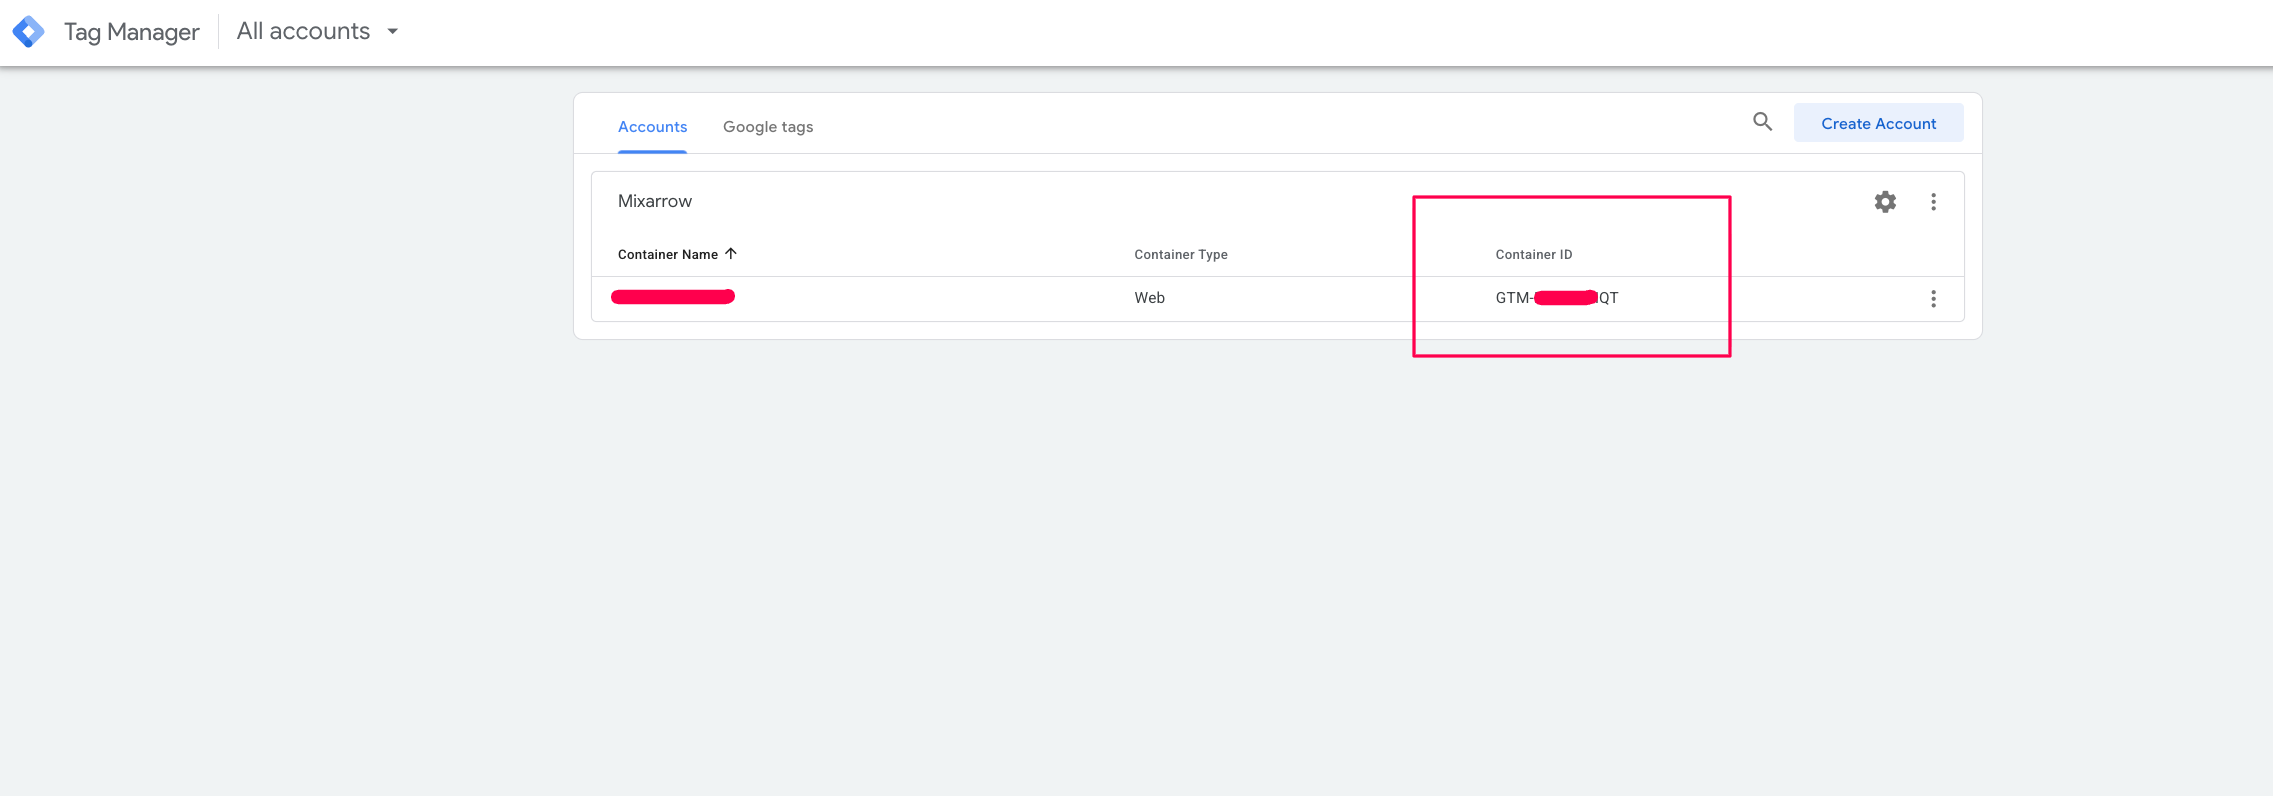
Finding your Container ID
Your GTM Container ID starts with GTM-, for example GTM-XXXXXXX. A Google Analytics measurement ID (which starts with G-) will not work here.
Go to tagmanager.google.com and open the container you want to use.
Find the Container ID in the top-right of the workspace header.
Copy the ID.
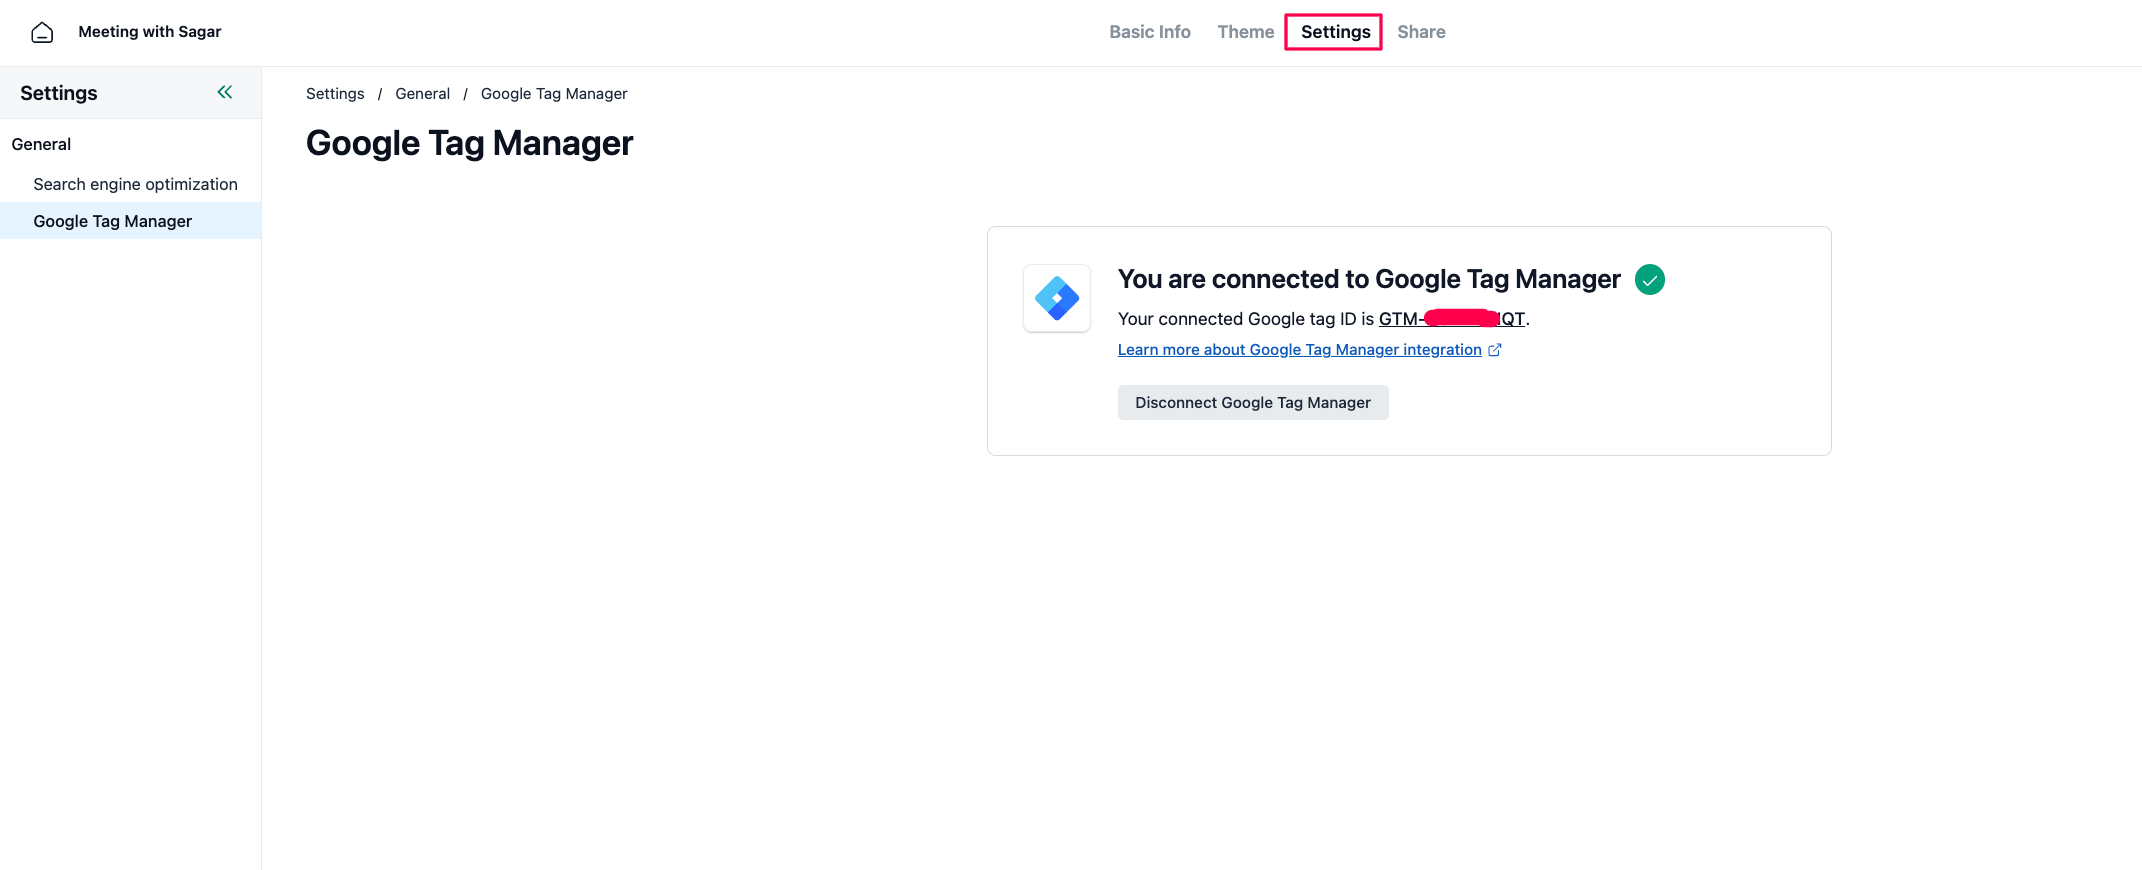
Connecting GTM to an intro page
Go to Intro pages from the left sidebar.
Open the intro page you want to track.
Click Google Tag Manager in the settings sidebar.
Paste your ID into the GTM Container ID field.
Click Connect.
NeetoCal will load the GTM container on this intro page.
Connecting GTM to a scheduling link
Go to Scheduling links from the left sidebar.
Open the scheduling link you want to track.
In the settings sidebar, open Integrations.
Click Google Tag Manager.
Paste your ID into the GTM Container ID field.
Click Connect.
The container will load on the booking page for this scheduling link.
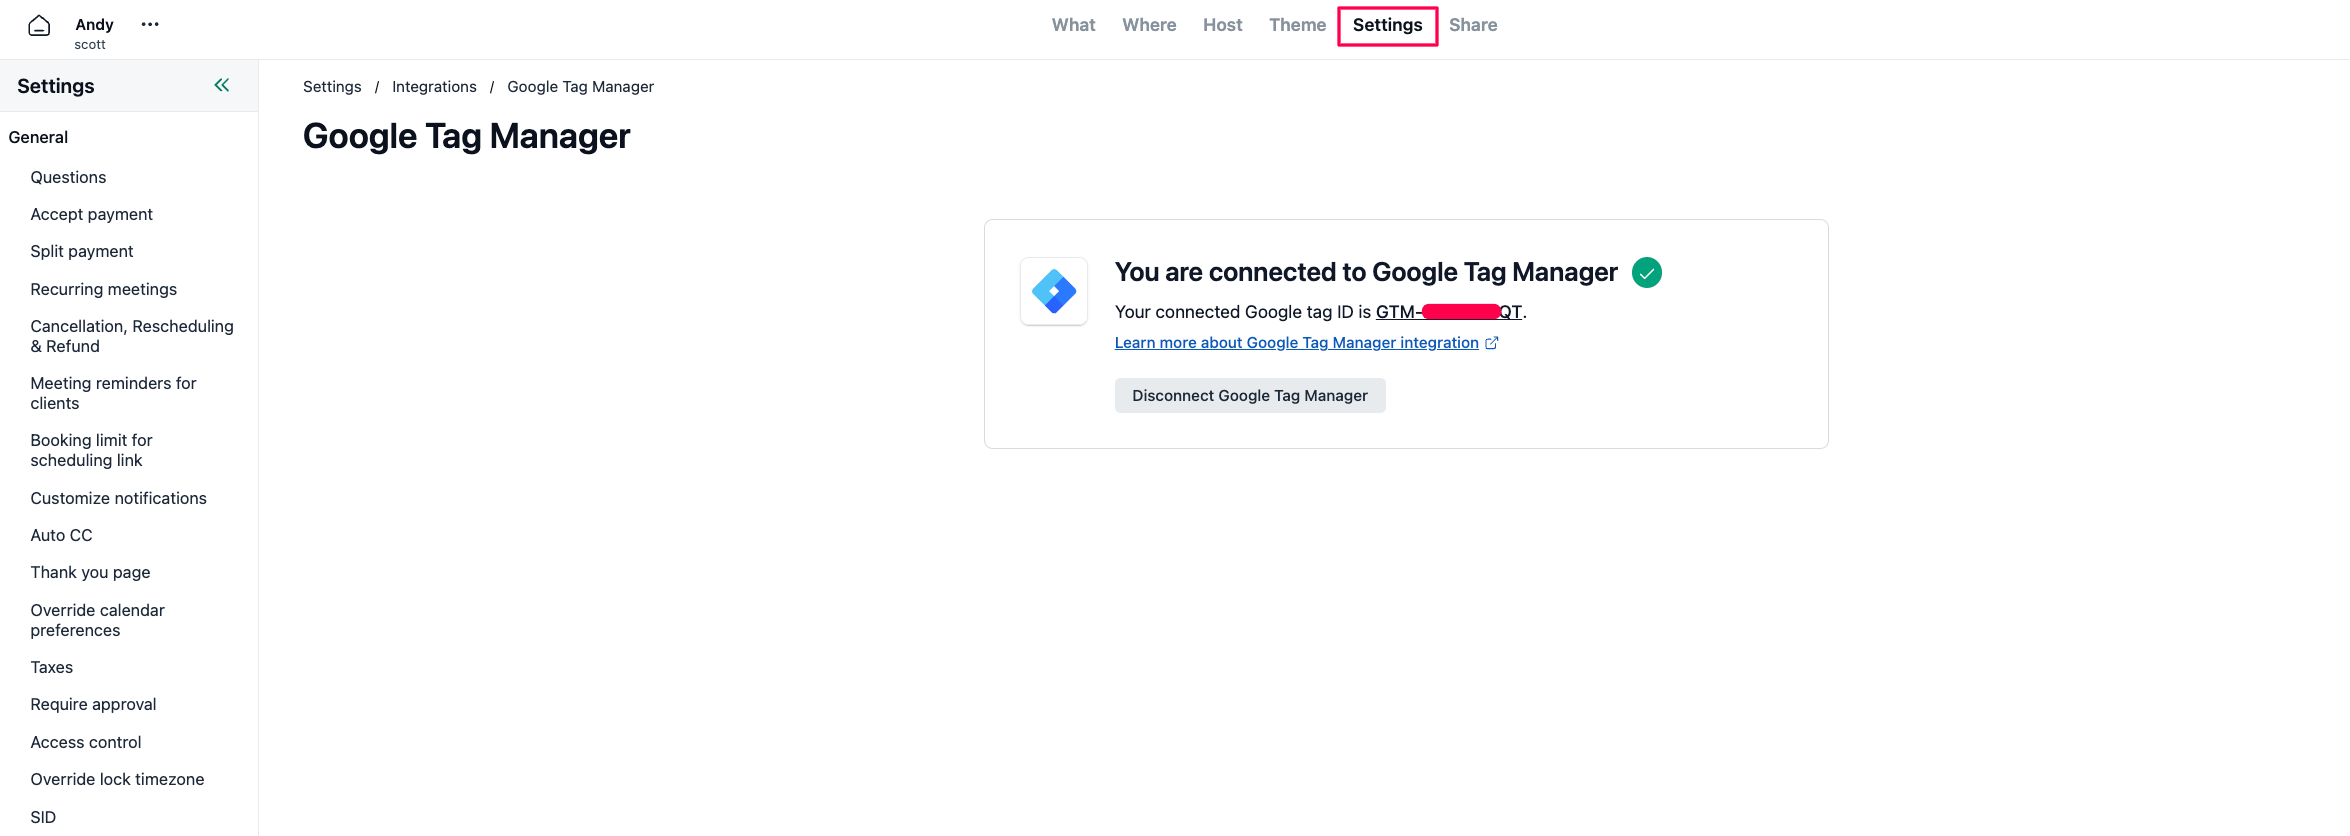
The tracking code will now be added to that scheduling page.
Setting up tags inside GTM
NeetoCal only loads the GTM container. It does not push custom events such as booking_confirmed or slot_selected to the data layer, so you cannot trigger off NeetoCal-specific events. All tag setup happens inside Google Tag Manager itself; Google's Tag Manager Help Center walks through every step.
At a high level, inside GTM you will:
Add the tags you want to fire, for example GA4 Configuration, Meta Pixel, or a Google Ads conversion tag.
Set up triggers using GTM's built-in trigger types, such as Page View, All Pages, Click, Form Submission, or Scroll Depth.
Use the Preview mode in GTM to verify each tag fires on the NeetoCal page.
Click Submit in GTM to publish the container.
If you only need Meta Pixel and don't want to set up GTM, NeetoCal also has a native Meta Pixel integration.