
You can control who can book meetings and who can open your intro pages. NeetoCal gives you a few ways to do this.
Once a customer gets access (by entering the password, signing in, or opening an invite link), they won't be asked again in the same browser.
If you want to test the access control yourself, please open the link in an incognito window or a different browser. Testing it in your current browser won't work because you're already authenticated and will be taken directly to the booking page.
Access control for the scheduling link
Open the scheduling link.
Go to the Settings tab.
Click on Access control.
Pick one of the options below.
Click Save changes.
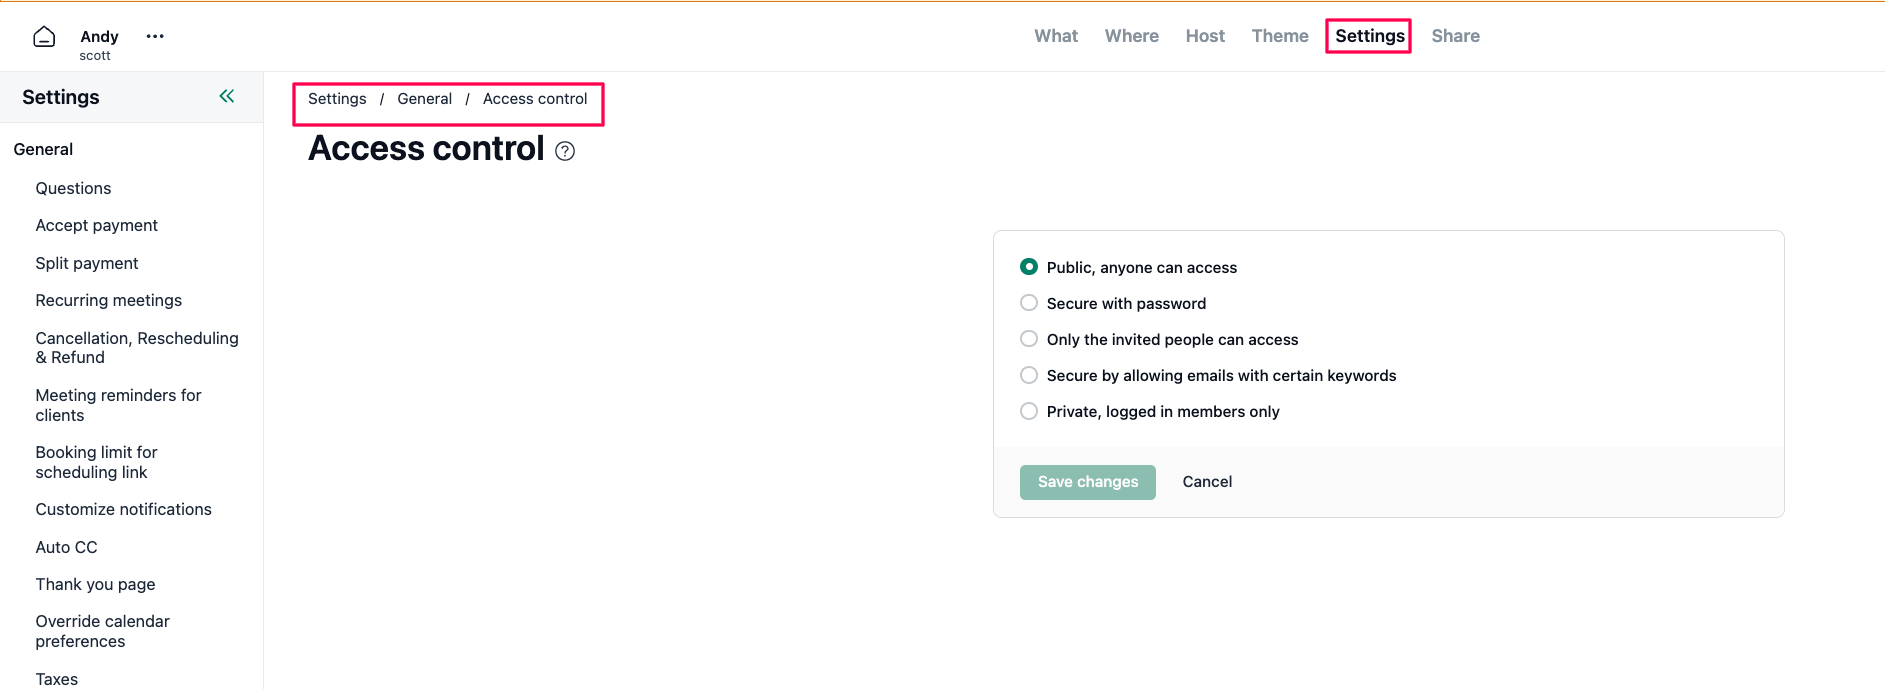
Here are the options.
Public, anyone can access
The link is open to anyone. Nothing to enter.Secure with password
Customers need to type a password before they can see your availability and book. Good when you want to share the link freely but still keep it private.Only the invited people can access
You add a list of email addresses, and NeetoCal sends each person their own invite. Only those people can book.Secure by allowing emails with certain keywords
You add allowed keywords (likeyourcompany.com). Customers sign in with Google or a one-time code, and only people whose email matches a keyword get through.Private logged in team members only
Limits the scheduling link to people on your NeetoCal workspace. This is helpful when scheduling link meant to be shared with internal team members.
Password protection for the intro page
If you want your intro page to be accessible to specific users, ensuring it stays private while remaining accessible to the intended users, you can set password protection.
This is useful when you want to share your availability or services with a specific group, like premium clients, internal teams, or event attendees, without making it public.
Go to Admin Panel.
Click on Intro pages.
Click on triple (...) dots on which intro page you want to set password.
Click on Edit.
Enable password protection.
Set the password.
Click on Save changes.