To integrate Telnyx with NeetoCal, you first need a Telnyx account. Refer to this help article guide to learn how to create an account on Telnyx. After creating account, you need to provide your Messaging Profile ID and an API Key (V2) to NeetoCal for integration.
Getting Profile ID
Click on Messaging in the navigation menu on the left-hand side of the portal.
Click Add new profile.
Enter a name for your Messaging Profile. Configure any other desired settings, such as webhook URLs.
Click Save to create the profile.
Your Messaging Profile has now been created.
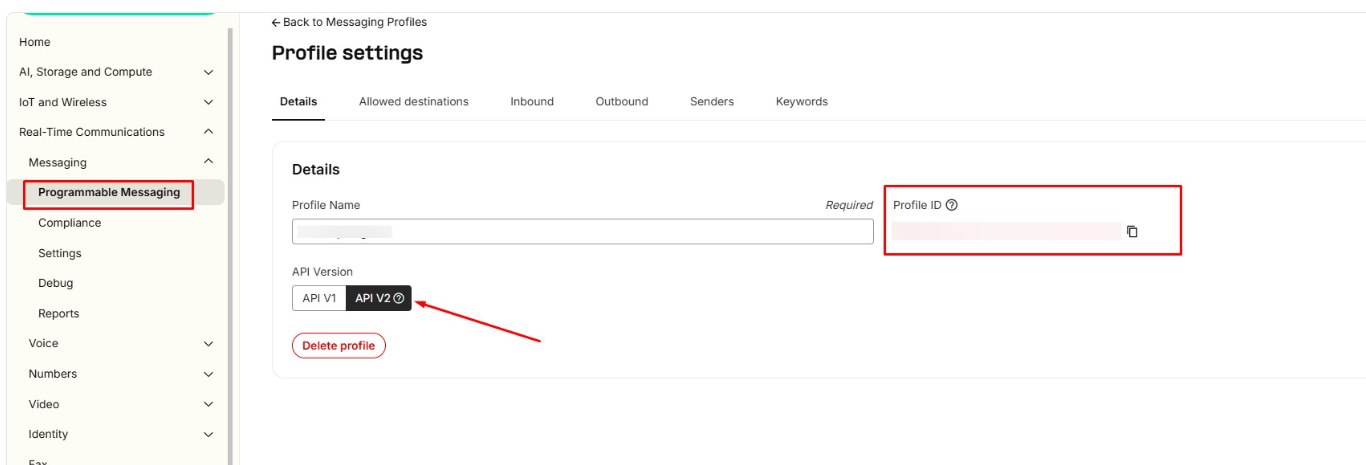
Please note NeetoCal currently supports Telnyx API V2, so ensure your profile is using API V2 as V1 is not supported.
Click on Edit icon on your messaging profile.
-
Now, you will be seeing Profile ID. This is how NeetoCal will identify your messaging profile when using Telnyx Messaging.
Generating API Key V2
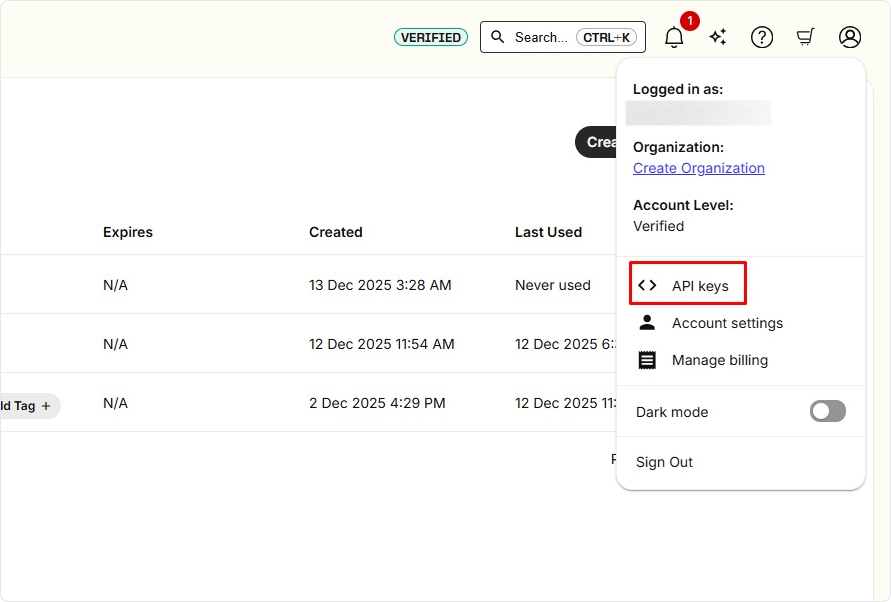
Click on your profile icon on right side top corner.
Click on API keys.
Click on Create API keys button.
You can add a Tag (optional).
Set the Expiration to No Expiration (recommended).
Click Create.
Copy the key value now as you will not be able to see it again. Losing a key requires creating a new one.
Integration with Telnyx
Go to Admin Panel.
Click on Other Integrations.
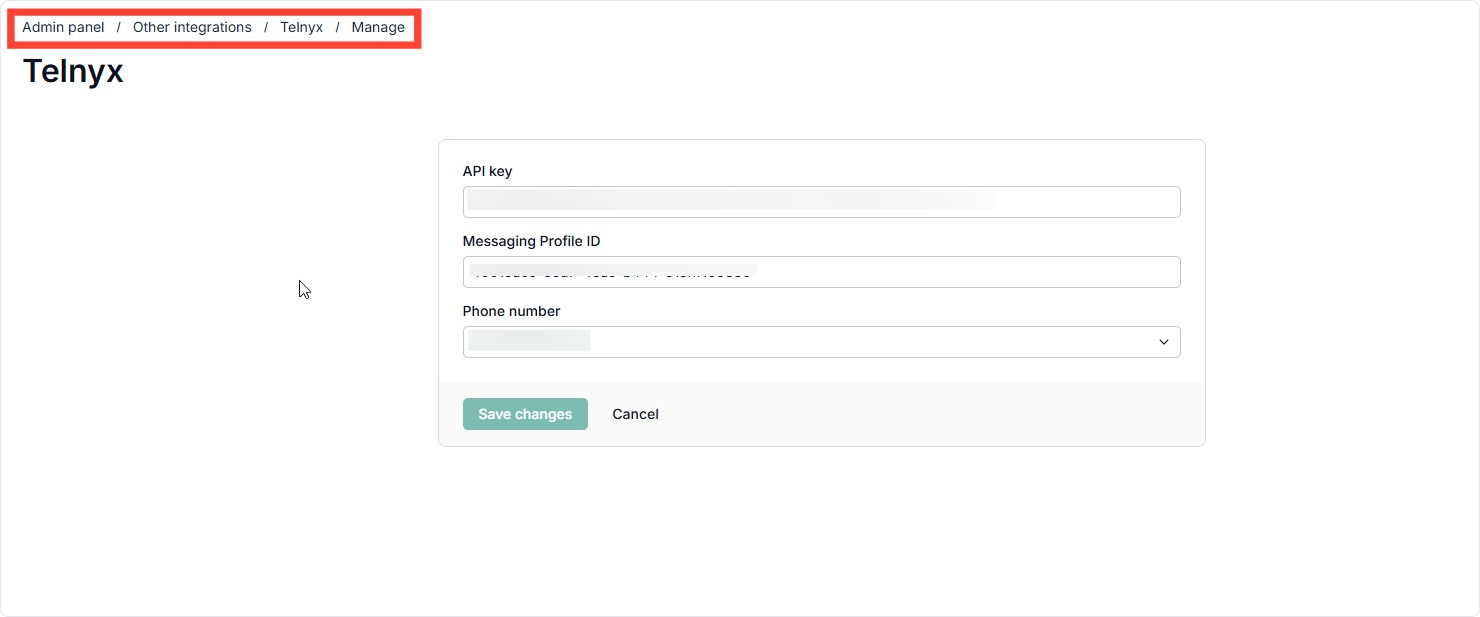
Click on the Telnyx card.
Click on Connect Telnyx.
Paste the API Key (V2) and the Messaging Profile ID.
Select the phone number you assigned to the messaging profile.
-
Click on Verify.
If you face issues with the Telnyx integration process, reach out to us at [email protected]. If you are unable to set up your Telnyx account, purchase a number, or encounter errors regarding API V2/Profile ID retrieval, please contact the Telnyx support team.